In this post I will walk through installing Nutanix Guest Tools on a Windows VM.
General Requirements and Limitations
- Virtual IP address must be configured on the Nutanix cluster. If the virtual IP address of the cluster changes, it will impact all the NGT instances that are running in your cluster. For more information, see Impact of Changing Virtual IP Address of the Cluster.
- VMs must have at least one empty IDE CD-ROM slot to attach the ISO.
- Port 2074 should be open to communicate with the NGT-Controller VM service.
- Hypervisor: ESXi 5.1 or later release, AHV (20160215 or later version).
- VMs should to be connected to a network that can be accessed by using the virtual IP address of the cluster.
- For Windows Server Edition VMs, ensure that Microsoft VSS services is enabled before starting the NGT installation.
- When a VM is connected to VG, NGT captures the IQN of the VM and stores the information. If you change the VM IQN and before the NGT refresh cycle (currently at 5 minutes) occurs you take a snapshot of the VM, the NGT will not be able to provide auto restore capability because the snapshot operation will not be able to capture VM-VG connection. As a workaround, you can manually restart the nutanix guest agent service by running $ sudo service ngt_guest_agent restart command on the Linux VM and from the Services tab of the Windows VM to update NGT.
Above General Requirements and Limitations referenced from my.nutanix.com
In the below how-to I will be using a Windows 2008R2 VM.
Enabling Nutanix Guest Tools and SSR (Self Service Recovery)
1. First login to Prism.

2. Next go to the ‘Home‘ dropdown and select ‘VM‘.

3. Next click the Table view, select your VM, and click Manage NGT.

4. From here, select

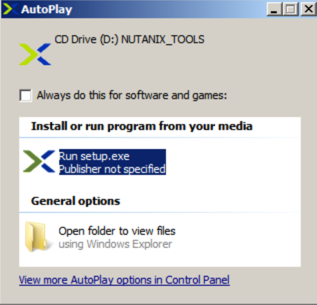
5. Now launch the console of the VM, Login, and you should see popup to ‘Run Setup.exe’. Click this to launch the install.
6. Next “Read” and Accept the license agreement. 🙂

7. Wait for the install to complete.


8. In the above screenshot you can see there is a new ICON on your desktop call “Nutanix SSR”. This is where you can access the Self Service Restore portal! If you launch the portal and see the below message then you need to configure a Protection Domain which can be referenced at…Configuring Nutanix Protection Domain
